Please follow the next steps to create your first Search Analytics account with ClimbinSearch.
Create the account
1) Before starting, please make sure that you have at least one Google User connected with ClimbinSearch.
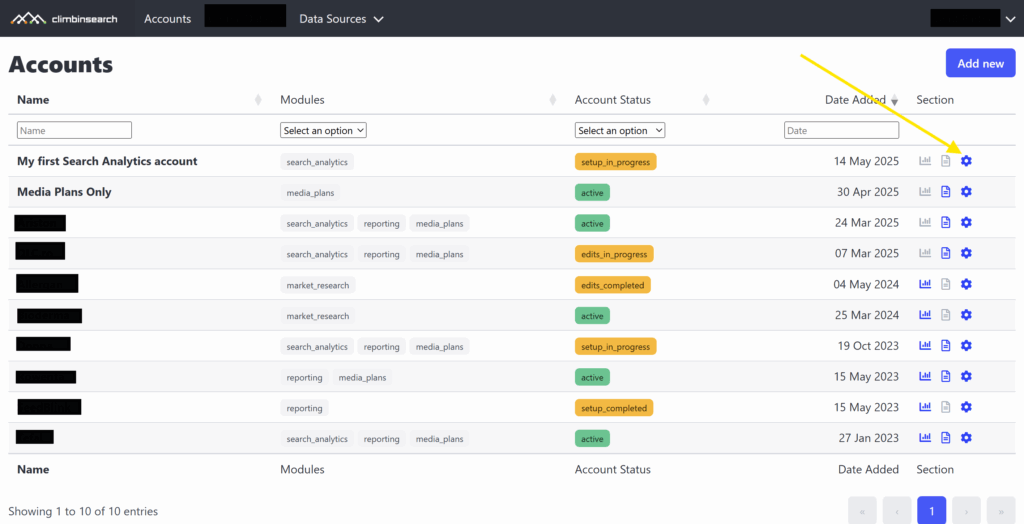
2) To add a new account, click the “Add new” button at the top-right corner of the Accounts page.
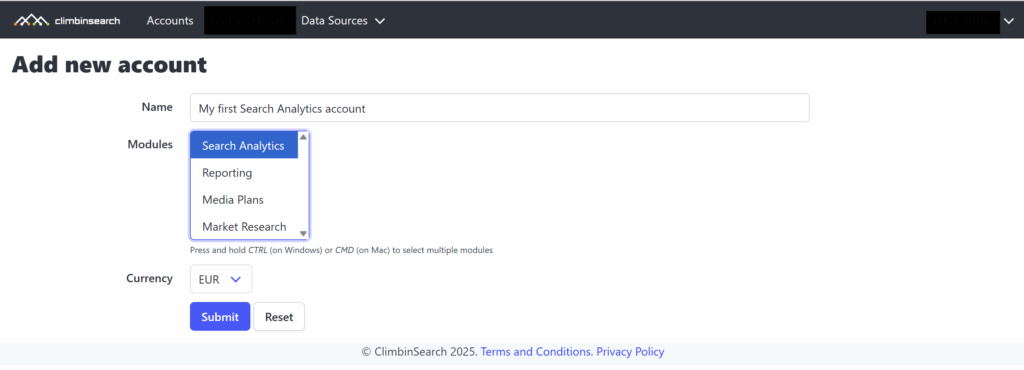
3) You will be redirected to the add new account page, where you will have to select the Search Analytics module. Also, select a currency that matches your Google Ads account currency. If you can’t find the currency in the list, please drop us an email at support@climbinsearch.com.
Configure the account
1) Once you have added the account, you can start configure it by clicking the “Settings” icon from the Account list page.
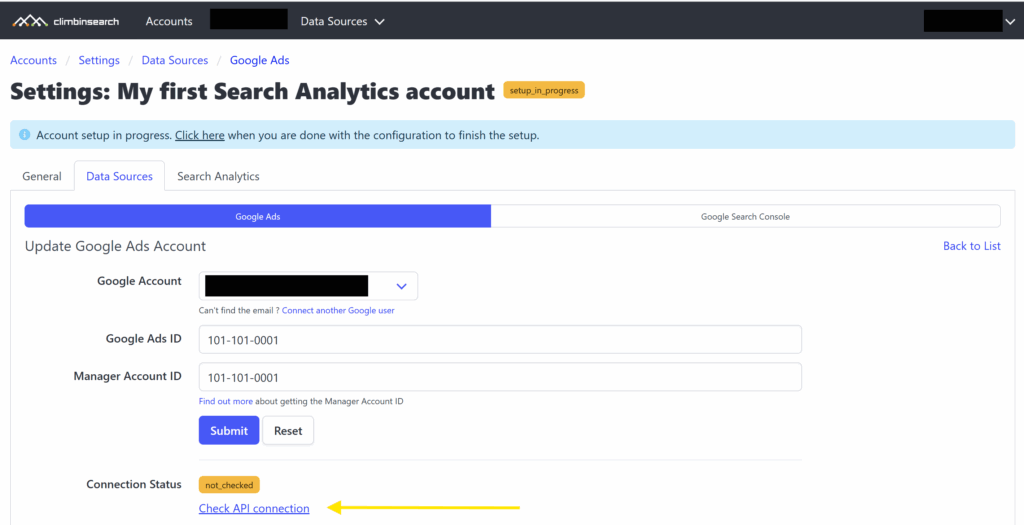
2) Define a Google Ads account from the Settings -> Data Sources -> Google Ads tab.
Note: after you have added the account, do not forget to test the API connection. This way we make sure the ClimbinSearch can access the Google Ads account data.
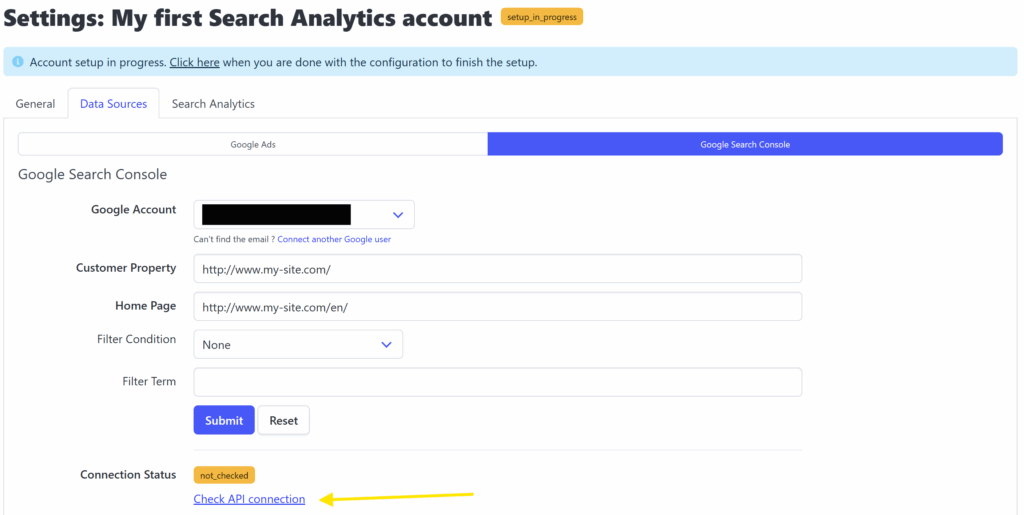
3) Define a Google Search Console account from the Settings -> Data Sources -> Google Search Console tab.
Optionally, you can apply some advanced data filtering logic for Search Console.
Note: after you have added the account, do not forget to test the API connection. This way we make sure the ClimbinSearch can access the Google Search Console account data.
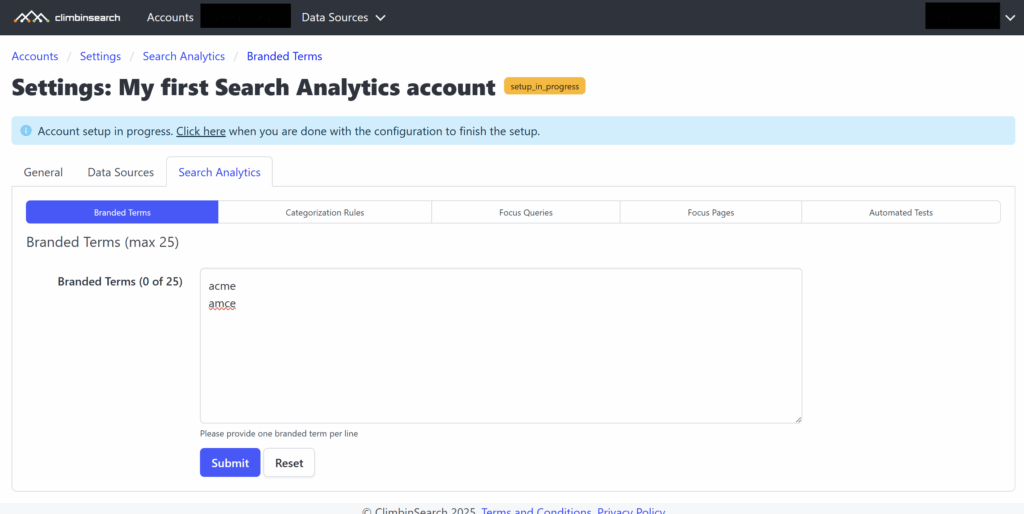
4) Define branded terms from Settings -> Search Analytics -> Branded Terms tab.
Provide a list of keywords that, when matched, will label the user search queries as branded.
5) When you are done with these steps, make sure to click the “Click here” link from the blue banner to indicate that the account configuration is ready. Once you do that, the system will pick up the configuration and start setting up the account.
Other account settings
Beside configuring the branded terms, you can also define Categorization Rules, Focus Queries, Focus Pages and start Automated Tests. All of these are optional and, depending of your pricing plan, they might or might not be available.